Why Climate Zones Pick Your Best Siding Option
Choosing exterior siding is rarely about looks alone. The right cladding must protect the structure, manage moisture, and stand up to local weather. Every climate zone has its own set of challenges that determine what materials last and how much maintenance they need. Matching siding type to the climate saves money and frustration over time.
This guide explains how regional conditions influence siding choices, costs, and performance. It covers planning, selection, durability, and preparation so homeowners can make clear decisions before signing a contract.
Style and Selection Explainer
Core Profiles and Fit
Common siding profiles include:
- Lap or clapboard: Horizontal strips suited for most architectural styles.
- Board and batten: Vertical boards with narrow battens covering seams, common on farmhouses.
- Shingle or shake: Smaller units with textured surfaces, often used for accents.
- Panel systems: Large sheets used on modern or commercial-style homes.
Each profile sheds water differently. Horizontal lap siding works best in moderate rainfall zones. Vertical board and batten gives better drainage on structures with wide overhangs.
Material Options, Pros, and Cons
| Material | Strengths | Limitations | Climate Fit |
|---|---|---|---|
| Vinyl | Low cost, no painting | Brittle in cold, softens in heat | Mild to moderate zones |
| Fiber Cement | Fire resistant, stable | Heavy, higher labor cost | Hot, humid, or wildfire-prone areas |
| Engineered Wood | Natural look, lighter than fiber cement | Needs sealing and repainting | Four-season regions |
| Metal (steel or aluminum) | High wind and impact resistance | Can dent, conducts heat | Windy coastal or hail zones |
| Wood (cedar, redwood) | Attractive grain, natural insulation | Requires regular treatment | Dry or mild climates |
Mix Rules for Balanced Facades
Combining materials can improve both function and design. Use durable fiber cement on lower walls and lighter vinyl in upper gables to control cost and weight. Keep transitions at logical horizontal breaks with proper flashing. Avoid mixing materials with incompatible expansion rates.
Trim and Accent Logic
Trim shields edges from water and debris. In wet climates, use PVC or factory-finished fiber cement trim to resist swelling. In dry climates, stained wood trim can work if joints are caulked and maintained. Corners and window surrounds should be flashed with metal or flexible membranes per manufacturer details.
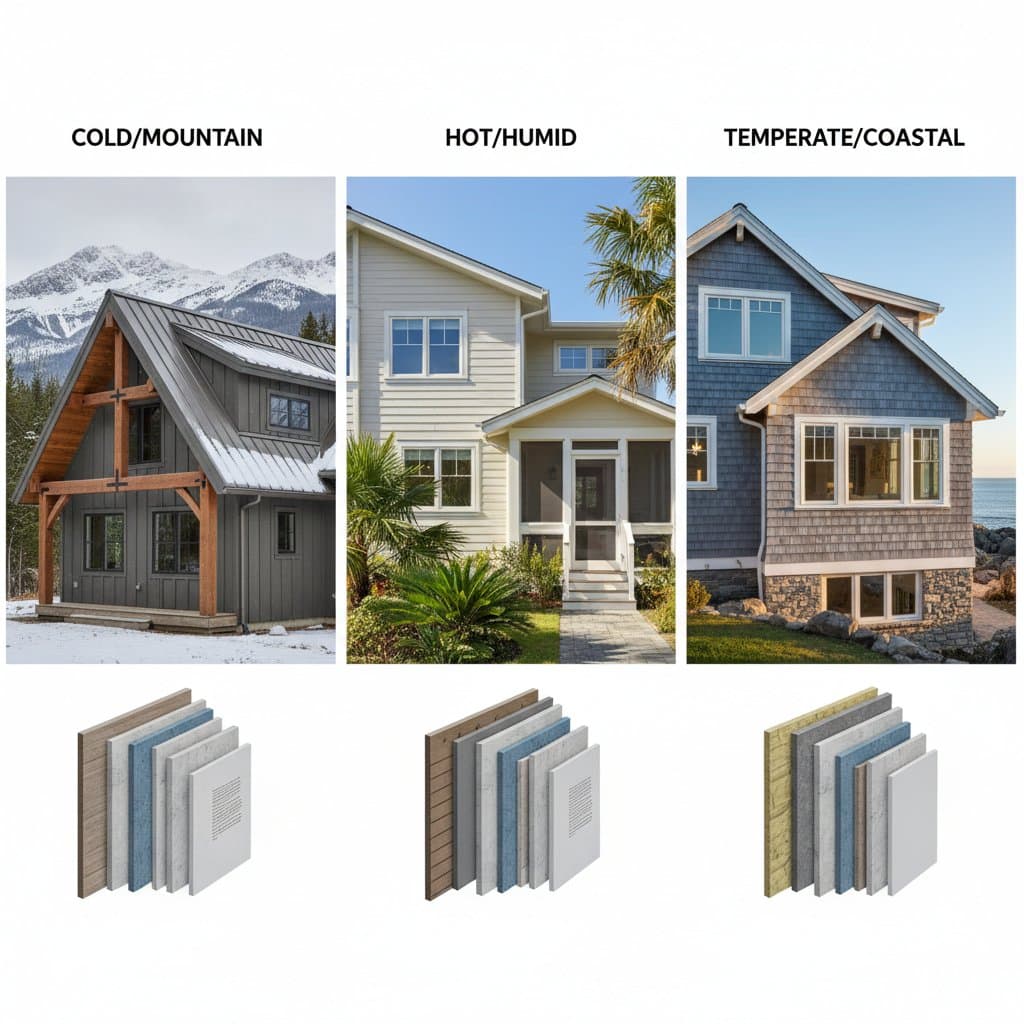
Example Scenarios by Home Type
- Coastal cottage: Corrosion-resistant fasteners, vinyl or fiber cement siding, breathable underlayment.
- Mountain cabin: Engineered wood or stained cedar with wide eaves and moisture barriers.
- Urban townhouse: Fire-rated fiber cement or metal panels with minimal seams.
- Suburban ranch: Vinyl or composite lap siding for easy maintenance.
Step-by-Step Project Prep
1. Define Goals and Scope
List your priorities: appearance, durability, or energy savings. Decide if you want full replacement or partial repair. Identify problem areas such as peeling paint or warped boards. This shapes the material short list.
2. Shortlist Contractors and Compare Bids
Ask for installers certified by the siding manufacturer. Request at least three written estimates that break down labor, materials, and disposal. Compare line items, not just totals. Cheaper bids often skip flashing or insulation.
3. Samples, Mockups, and Approvals
Inspect physical samples under natural light. Review how seams align with windows and corners. A one-wall mockup helps confirm color, reveal depth, and fastening pattern. Approve the layout in writing to avoid later disputes.
4. Site Readiness and Daily Routine
Clear shrubs and furniture away from walls. Disconnect exterior power outlets and remove downspouts. Expect noise and dust during removal. Ask where crews will store materials overnight. Keep pets and children clear of work zones.
5. Quality Checks at Each Milestone
- After tear-off, confirm sheathing is sound and dry.
- During install, check that fasteners are not overdriven.
- Before final inspection, verify trim joints are sealed and touch-up paint is applied.
A good contractor welcomes these checks. Document progress with photos for warranty support.
Living with Your Cladding
Once the siding is installed, climate continues to shape how it behaves. Expansion and contraction can open small gaps that should be resealed before wet seasons. Sunlight may fade darker colors faster, especially on southern exposures. Schedule quick seasonal inspections to stay ahead of issues.
Maintenance Checklist
- Wash siding gently each spring and fall.
- Repaint or clear-coat any exposed wood grains.
- Keep sprinklers directed away from walls.
- Prune vegetation that traps moisture.
- Refasten loose panels before storms.
Common Questions
How can I tell if my siding is rated for my climate?
Check the product’s technical sheet for wind, fire, and moisture ratings. Compare those to local building code requirements. If numbers are missing, ask the manufacturer for certified test results.
Can insulation be added under new siding?
Yes. Rigid foam or mineral wool boards can be installed behind siding to improve energy performance. The added thickness may need longer fasteners and extended window trim.